How to Create an eCommerce Website in WordPress Step-by-Step
Creating an online store can easily feel overwhelming. The decisions you make now — regarding hosting, security, and payment processing — will impact your business for years to come. Any misstep in these technical choices could lead to costly setbacks down the line, so where to begin? Whether you’re launching your first venture or scaling…
By: Stellar Team · Published: April 14, 2025 · Updated: April 3, 2025
Creating an online store can easily feel overwhelming. The decisions you make now — regarding hosting, security, and payment processing — will impact your business for years to come. Any misstep in these technical choices could lead to costly setbacks down the line, so where to begin?
Whether you’re launching your first venture or scaling an existing operation, this comprehensive guide will detail every essential facet in building a secure and high-performing WordPress ecommerce store. From selecting the right hosting solutions to configuring payment gateways and optimizing for mobile devices, we’ll break down complex technicalities into actionable steps.
Follow our structured approach and you’ll avoid common pitfalls that can waste both time and money, while building a firm foundation for future success.
Key points
Setting up: WordPress hosting, SSL, and essential costs for your online store

The initial steps to launch your online store should revolve around major decisions regarding domain registration, hosting setup, and security measures. These foundational elements will determine your site’s performance and long-term viability.
Domain name
Choosing the right domain name helps your site’s readability, brand image, and recognition. Focus on selecting a name that accurately represents what you are selling or embodies your brand.
The most suitable extension for global scalability is .com, yet suitable .com domains are increasingly difficult to find. Fortunately, a variety of other TLDs (Top Level Domains) are now available, such as .shop, .store, .buy, and many more commerce-related terms. Industry-specific options like .shoes, .tires, and .toys can also add relevance.
When selecting a domain name, avoid overly creative choices that include random punctuation or unusual separations — these can lead to decreased readability and memorability for customers. Standard domains typically cost between $10 and $20 per year on average, while domains with more unusual extensions can cost significantly more.
Hosting setup
Selecting a reliable hosting provider is a must for ecommerce success. The right host can affect your website’s speed, uptime, and overall functionality. Prioritize providers that offer dedicated WooCommerce optimization, managed updates, and automated backups. If you plan on scaling your online store in the future, consider a hosting provider that allows for easy upgrades.
Here are some top options for hosting providers:
- Liquid Web: Offers hosting plans ranging from $5/month to $275/month ($60–$3,300 annually).

- Cloudways: Provides plans between $14/month and $279/month ($168–$3,348 annually).
- SiteGround: Options range from $17.99 to $44.99/month ($215.88–$539.88 annually).
- Pressable: Starts at $37.50/month ($450 annually with two months free).
Secure Sockets Layer (SSL) certificates
An SSL certificate protects sensitive customer data during transactions. Encryption safeguards data exchanged between browsers and servers through cryptographic protocols. When properly implemented, SSL certificates create secure connections for both businesses and their customers.
Most hosting providers include free SSL certificates in their packages, although others come with a fee. The following are some of the most reputable providers around:
- Let’s Encrypt: Offers free certificates.

- DigiCert: Prices start from $26/month ($312 annually).
- Comodo SSL: Prices begin at $7.95 annually.
First-year setup essential cost breakdown
|
Component |
Price (annual) |
|---|---|
|
Domain |
~ $10-$20 |
|
Hosting |
~ $48-$540 |
|
SSL certificate |
~ $0 |
|
Total |
~ $58-$560 |
Setting up WooCommerce and core security features
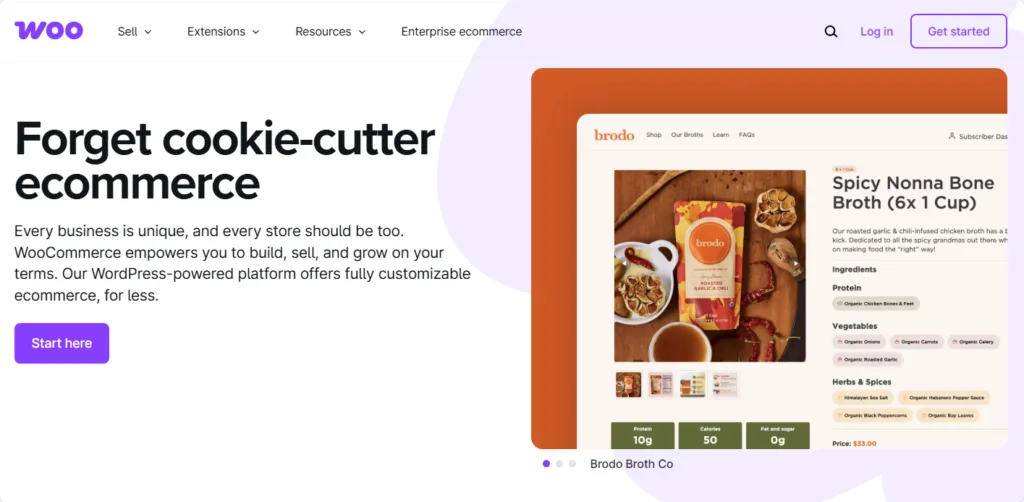
Now that the basic technical requirements have been set up, it’s time to create your website and establish your online store. Due to a huge number of extensions, integration with WordPress, cost-effectiveness, scalability, and community support, we’re going to focus on WooCommerce as your ecommerce platform.
This section will focus on configuring WooCommerce’s main features, plus how to implement security measures to protect you and your customers online.
WordPress setup
If you haven’t already done so, you’ll need to get set up on WordPress. In this guide, we’re focusing on WordPress.org, the self-hosted platform that offers enhanced flexibility and customization options for store owners, not WordPress.com, which is a managed platform. If you’re not sure which option is best for your store, WordPress.com has a handy guide to help you choose.
Most hosting providers offer automated WordPress installation, which is the easiest method to get started. Failing that, here’s a DIY shortcut:
- Login to your hosting panel and navigate to your dashboard.
- Locate the option to install WordPress and initiate the installation process.
- Enter your login credentials — make sure to keep these secure, as they provide access to your WordPress admin panel.
- Add necessary information, including your domain name.
- Run the installation.
You can also manually install WordPress by:
- Downloading it from WordPress.org.
- Uploading the files via SFTP.
- Creating a MySQL database using cPanel.
- Configuring the wp-config.php file.
- Running the installation script by visiting your domain.
Detailed instructions for manual installation are available on WordPress.org.
WooCommerce initial setup
Once WordPress is installed, you can proceed with installing WooCommerce and transform your site into an online store. Here are two methods for installing WooCommerce:
- Download the WooCommerce plugin:
- Download the plugin from the WooCommerce website.
- Log in to your website.
- Navigate to Dashboard > Plugins > Add New > Upload.
- Select the downloaded plugin file.
- Install and activate it.
- Search for WooCommerce from within your website:
- Log in to your website.
- Navigate to Dashboard > Plugins > Add New > Search Plugins.
- Type ‘WooCommerce’ in the search bar.
- Install and activate it.
After activating the WooCommerce plugin, the Setup Wizard will appear, guiding you through steps to prepare your store for selling.
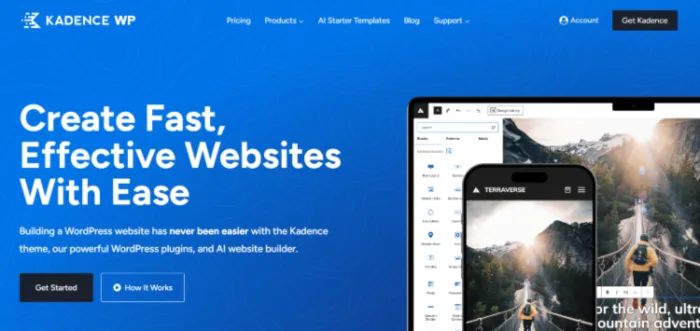
During this process, you’ll be prompted to select a theme. It’s advisable to choose a customizable theme that aligns with your brand identity. WooCommerce recommends using Storefront for free, but we recommend choosing a high-performance theme like Kadence that’s compatible with the WooCommerce ecosystem.
You can also add optional plugins at this stage for additional functionality, such as payment gateways or subscription services, but it’s often best to configure basic settings first. Make the following a priority:
- Store locale and currency.
- Measurement units.
- Inventory management preferences.
Once these basics are set up, connect your store to your WordPress account if you haven’t done so already. If you need a WordPress account, you can create one free of charge.
Core WooCommerce settings
To configure product catalog settings, navigate to WooCommerce > Settings > Products. Here you can adjust:
- Shop page display preferences.
- Product image dimensions.
- Measurement units.
- Product sorting options.
- Inventory management settings.
Make sure all other necessary settings are configured as well. WooCommerce provides extensive guides on setting up every aspect of your online shop in their ‘Getting Started’ documentation.
Security implementation
Security should be a major concern for online shop owners and managers — a data breach can send your site offline, put customers at risk, lead to hefty compliance fines, and harm business reputation. Protecting your website from hacker attacks can seem daunting without guidance, so be sure to follow these steps:
- Implement SSL certificates: As we’ve seen, an SSL certificate encrypts data exchanged between browsers and servers, safeguarding sensitive customer information during transactions.
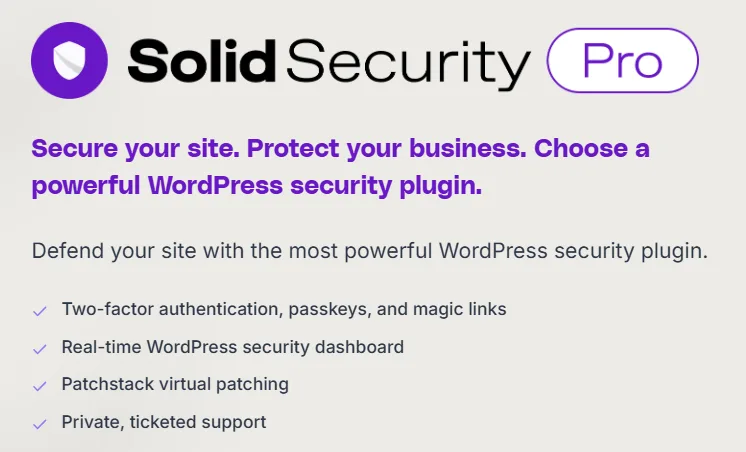
- Use security plugins: Consider employing security plugins like Solid Security Pro ($99 annually), Sucuri ($229 annually), or WordFence ($119 annually). These plugins provide comprehensive protection against various threats, including plugin vulnerabilities, malware, and brute-force attacks.
- Regular updates: Keep all software updated — this includes WordPress core files, themes, and plugins — to protect against vulnerabilities that hackers may exploit.
Configuring payment gateways, tax, and shipping calculations
Without these configurations, store owners risk running into issues that could lead to lost conversions, revenue, or even legal complications. Let’s dive into how to set up these essential components for your WooCommerce store.
Payment processing setup
Payment gateways simplify the online payment process for your business, allowing you to receive payments faster and more securely. Choosing the right payment gateway involves considering several key factors:
- Cost: Look for transaction fees and monthly charges.
- Location: Ensure the gateway supports your business’ operational regions.
- Security: Opt for gateways with good security measures.
- Support for subscriptions: If you plan to offer subscription services, ensure compatibility.
- Variety of payment methods: It’s advisable to provide at least 2–3 payment options. Popular methods include credit cards, PayPal, Apple Pay, and buy-now-pay-later options like Klarna.
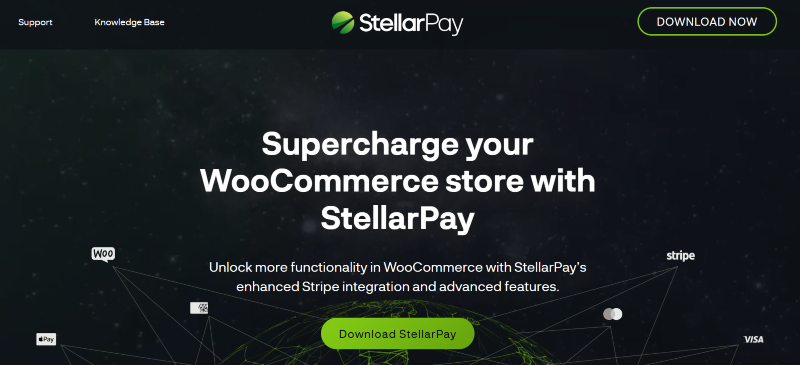
A notable option when using Stripe is StellarPay, which offers features such as:
- An intuitive payment management dashboard with analytical tools.
- Complete control over payments and refunds.
- Subscription handling capabilities.
- Advanced reporting features.
- Zero processing fees.
StellarPay lets you streamline your payments while ensuring a secure and efficient transaction experience for your customers.
Tax configurations
Setting up taxes in WooCommerce is one of the first tasks you’ll need to complete. Proper tax configuration ensures compliance with local regulations and transparent pricing for customers. To configure taxes in WooCommerce:
- Navigate to WooCommerce > Settings > General.
- Scroll down and check the box labeled Enable Taxes and Tax Calculations.
- Select Save Changes.
Once enabled, access the tax settings by going to WooCommerce > Settings > Tax. Your tax classes will depend on the products you sell and the legal jurisdiction in which your store operates.
Here are some general steps to follow:
- Set up tax classes and rates based on your products.
- Configure regional tax rules according to where you operate.
- Enable reporting features for tax tracking.
Shipping setup
Shipping zones are geographical areas where you deliver products. Each customer can only match with one zone. To set up shipping:
- Go to WooCommerce > Settings > General and verify your shipping location settings.
- Navigate to WooCommerce > Settings > Shipping and create your shipping zones.
- Add shipping methods to each zone.
Tips for setting up shipping zones:
- Customers will only see the shipping methods available for their address within their corresponding shipping zone.
- Each customer matches only one shipping zone based on their address.
Managing products and optimizing the customer experience
This section focuses on the technical implementation of product management through three core areas:
- Product configuration
- Store architecture
- Performance optimization
Product configuration
Setting up your products correctly is essential for customer satisfaction, building trust, and improving your online store’s performance. Consider these aspects when configuring your products:
- Product images: Always include high-quality product images that are set to lazy load. This practice improves loading times for a better user experience.
- Product descriptions: Provide clear and valuable product descriptions. Ensure that they are straightforward and informative, helping customers make informed decisions.
- Pricing accuracy: Double-check product prices to avoid discrepancies. Additionally, assign the correct tax classes to each product and implement dynamic pricing rules based on product type and jurisdiction.
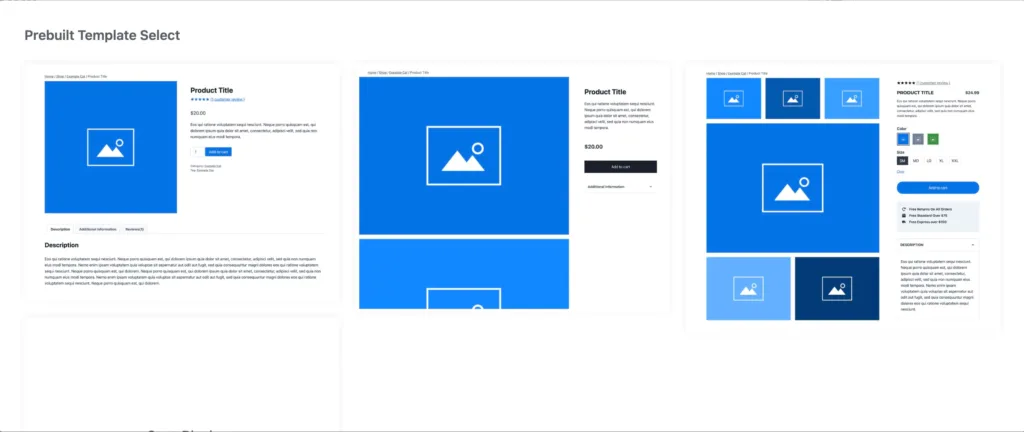
Kadence Shop Kit offers dozens of options for customizing your WooCommerce product pages. Implement advanced gallery styles for your product images, fully customize your page layout, and take full control over your product variation and pricing display, among other powerful customization options.
Store architecture implementation
“A well-structured site architecture is key to improving your search engine rankings. Clear structure helps search engines discover, index, and read all pages on your site. Without it, especially in larger online stores, you risk leaving pages unindexed, negatively impacting your visibility.”
Mate Šimić, Web Engineer, StellarWP
To optimize your store architecture:
- Hierarchical URL structures: Build logical URL structures for products and categories to facilitate easier navigation.
- Template overrides: Set up template overrides for product, cart, and checkout pages to maintain consistency in design.
- Account dashboard: Configure the account dashboard with subscription management capabilities if applicable.
- Legal pages: Implement required legal pages with version control to ensure compliance.
- FAQ pages: Consider adding FAQ pages to address common customer inquiries.
- Other important pages for optimization include:
- Cart page (and mini cart if desired).
- Product pages.
- Checkout pages.
- My Account page for customer accounts and subscriptions.
Technical (and SEO) optimization
Here are some key strategies:
- Lazy loading: Implement lazy loading for product images and related content to reduce initial load times.
- Browser caching: Configure browser caching for product pages. Note that checkout pages or other dynamic pages should never be cached to avoid issues during the purchasing process.
- Mobile optimization: Ensure your online store is mobile-friendly by using responsive designs that adapt to any screen size. Website builders like Kadence Blocks offer responsive controls that enable you to tweak your site design for any screen size.
- Payment gateway optimization: Make sure payment gateways are optimized for mobile devices to facilitate trouble-free transactions.
- Clear URL structure: Maintain a clear URL structure and site hierarchy for better navigation and readability.
- Performance analysis: Use Google’s Page Speed Insights tool to analyze your page speed. It provides specific recommendations to reduce load times and improve overall site performance.
- Development environments: Maintain development, production, and staging environments to test all additions, changes, and updates before implementing them on the live site. This practice minimizes potential errors and ensures an excellent user experience.
Installing and configuring essential store plugins and theme
As well as looking attractive, the selection of your theme directly impacts your store’s performance and conversion rates. When choosing a theme, focus on three critical criteria:
- WooCommerce compatibility: Ensure the theme works with WooCommerce.
- Mobile-first design: A responsive design is essential, as a significant portion of online shopping occurs on mobile devices.
- Customization options: Look for themes that allow easy customization of product displays, enabling you to showcase your offerings.
To test themes for mobile responsiveness, use Chrome’s device simulator. This tool allows you to view how your store appears on various screen sizes, ensuring a consistent user experience across devices. The Kadence theme is an excellent choice for optimal performance, as it integrates well with popular plugins while offering a user-friendly interface and extensive customization options.
When it comes to plugins, think of them as building blocks for your store. Each additional plugin should improve your store’s performance and functionality without compromising speed or the user experience. Prioritize plugins that align with your business goals and improve overall efficiency.
Plugins for increased store performance
Here are some essential plugins to consider:
- Payment processing: StellarPay
This free payment gateway plugin simplifies Stripe integration with one-click installation and automatic SSL detection. StellarPay follows Stripe’s best practices for an optimal checkout experience, which can boost conversions and minimize cart abandonment. - Shipping: Conditional Shipping and Payments for WooCommerce
Priced at $109 annually, this plugin allows you to set specific shipping conditions based on various factors for a better customer experience. - SEO: SEOPress PRO
While many options exist, SEOPress PRO comes recommended due to a great feature set. A free version is available, with paid plans starting at $99 annually. An SEO-related tool can help to optimize your site for search engines.

- Design: Kadence Shop Kit
For $99 annually (or $219 for the full Kadence design plan), this plugin improves the design capabilities of your store, allowing for greater customization and improved aesthetics. - Performance: WP Rocket
This caching plugin improves load times and overall site performance; priced at $59 annually.
- Email marketing:
- Klaviyo
Offers a free plan for up to 250 subscribers, with paid plans starting at $35/month ($420 annually). Klaviyo is known for its powerful automation features. - MailPoet
Starts at $64.80 annually for up to 500 subscribers, making it a cost-effective option for email marketing. - Mailchimp
Starts at $20/month ($240 annually) for up to 500 subscribers and provides comprehensive email marketing solutions. - FluentCRM
This self-hosted email marketing solution integrates directly into your WordPress site and is user-friendly compared to more complex options like ActiveCampaign.
- Klaviyo
For optional product add-ons, WooCommerce offers an extensive list of official extensions in their marketplace. Consider exploring other extensions tailored to your specific needs, whether that’s optimizing your product displays or driving additional sales via coupons and cross/up-sell plugins.
Before installing any plugin, always test its functionality and compatibility in your development and staging environments. Check the following:
- What are the PHP version requirements? Ensure plugins are compatible with your site’s PHP version.
- Is the plugin compatible with your WooCommerce version?
- Verify that there are no conflicts with existing plugins.
- Determine the impact of adding new plugins on your live website to prevent conflicts.
Remember to measure your online shop’s loading times before and after each plugin installation to monitor any impact on site speed and overall performance.
Pre-launch checklists – are all bases covered?
Ensuring that your online store functions properly and that all aspects are validated before going live is crucial for setting up a successful ecommerce business. A thorough pre-launch checklist helps to identify potential issues that could hinder customer experience or lead to lost sales. Here’s a comprehensive list of aspects to rigorously test before launching your online store:
- Checkout process testing: Conduct thorough testing of the checkout process to ensure a smooth customer experience. This includes verifying that all payment methods work correctly and handle errors — such as incorrect credit card information — with grace.
- Legal compliance checks: Verify compliance with GDPR and CCPA regulations regarding data handling. Ensure that your terms of service and privacy notices are clearly placed and easily accessible to users.
- Subscription payment flows: If you offer subscriptions, test the recurring billing functionality for various subscription lengths and payment methods. Confirm that payments process smoothly across all supported gateways.
- Customer notification flows: Test the accuracy and timely delivery of order confirmation emails, shipping updates, and subscription renewal reminders. Additionally, check the functionality for generating coupons to ensure they work as intended.
- Customer account systems: Confirm that password resets function correctly and that customers can securely access their order history. Test interfaces for managing subscriptions and updating account details.
- Multi-currency handling: If you cater to international customers, validate automatic currency conversions for accurate pricing. Test display rules for multi-currency pricing on your storefront to ensure clarity for users.
- Inventory management systems: Validate stock-level triggers for reordering and low-stock alerts. Test backorder handling and ensure proper tracking of product variants to avoid overselling.
- Design consistency: Ensure uniform branding across all pages, including consistent fonts, colors, and styles. Use prominent, action-oriented buttons with compelling language like Buy Now or Get Yours! to guide customers toward purchases.
- Complex tax scenarios: Test tax calculations for digital goods and cross-border transactions. Validate VAT handling and compliance with regional requirements to avoid legal issues.
- Search engine optimization: Verify that all internal and external links function correctly. Ensure contact or subscription forms operate as intended, providing appropriate success or error messages.
Monthly maintenance checklists
Monthly maintenance checks keep your WooCommerce store secure, fast, and reliable. These checks help optimize performance, prevent downtime, ensure accurate customer experiences, and maintain compliance with legal requirements.
Regularly reviewing backups, analytics, and updates safeguards your data and provides actionable insights for business growth. The following checklist is based on WooCommerce’s best practices for monthly maintenance:
- Regular software updates: Ensure that your WordPress core, WooCommerce, themes, and plugins are consistently updated to their latest versions. This practice protects against security vulnerabilities and maintains compatibility across your site. Regular updates are needed to obtain new features and improvements.
- Vulnerability scanning: Conduct routine security scans using tools like Solid Security Pro to detect and address potential threats. Regular vulnerability assessments help ensure that your store remains secure and operational, safeguarding customer data and trust.
- Routine backups: Implement real-time backup solutions such as Solid Backups — NextGen to safeguard all stored data. Regular backups enable quick restoration in case of data loss or corruption, providing peace of mind that your information is secure.
- Checkout process testing: Regularly test the checkout process and payment gateways using sandbox environments to ensure a seamless and error-free purchasing experience for customers. StellarPay offers features like Test Mode that enhance this testing process.
- Site speed optimization: Perform periodic speed tests to identify issues affecting load times, such as uncompressed images or excessive plugins. Addressing these issues improves the user experience and reduces bounce rates, leading to higher conversion rates.
- Broken link checks: Use tools to identify and fix broken links on your site. Ensuring that all internal and external links direct customers appropriately maintains site credibility and positively impacts SEO rankings.
- Inventory management: Regularly update product listings and stock levels to reflect current availability. This practice prevents overselling and ensures that customers receive accurate information about product availability.
- Customer communication testing: Verify that all automated customer communications — such as order confirmations and shipping notifications — are functioning correctly. Ensure these messages deliver the intended information to maintain customer satisfaction.
- Database optimization: Periodically clean and optimize your database to improve site performance. A well-maintained database contributes to faster page loads and a smoother user experience by ensuring efficient data retrieval.
- Review analytics and reporting: Regularly analyze site analytics to monitor traffic patterns, sales data, and customer behavior. Use these insights to make informed decisions and strategic improvements that can drive business growth.
You can download our maintenance checklist here (opens in a new tab).
Launch your secure WordPress store today
Setting up an ecommerce store on WordPress is a systematic process that requires meticulous attention to tech, security, and the overall user experience. Consider the following 1, 2, 3 as nothing less than essential:
- Prioritize a mobile-first approach in all aspects of your store setup, as mobile commerce continues to dominate online shopping trends.
- Implement a testing strategy that covers all critical store functions before launch, and commit to maintaining this strategy through regular updates.
- Focus on creating scalable solutions from the start by choosing hosting plans, payment gateways, and plugins that can grow with your business.
In all that you do, remember to balance functionality with performance. Every added feature should provide clear value without compromising your store’s speed and reliability. Establish clear protocols for handling customer data, transactions, and security measures to build trust and ensure compliance with legal requirements.
With careful planning and correct execution, you can launch a secure WordPress store that meets today’s demands but can adapt to whatever the future may have in store. We wish you all the best on your exciting journey!


Stay Updated
Stay informed about the latest StellarPay updates, new features, and improvements. Subscribe to our newsletter for expert tips to help your clients succeed with their eCommerce websites.
