
Overview #
StellarPay is a payment gateway plugin that integrates with your WordPress website and allows you to handle payments seamlessly using your connected Stripe account. This guide will walk you through the process of issuing refunds for payments made through WooCommerce.
Accessing the Payments Page #
To process a refund, you’ll need to navigate to the Payments section of the StellarPay plugin. Follow these steps:
- Log in to your WordPress Admin panel (WP-admin).
- Locate the StellarPay menu item in the sidebar.
- Click on the Payments submenu item.
Finding the Payment #
On the Payments page, you will see a list of all payments processed through your LIVE Stripe account. To find the payment associated with the WooCommerce order that you would like to refund:
- Scan through the list or use the search feature if available.
- Once you locate the relevant payment, click on it to view more details.
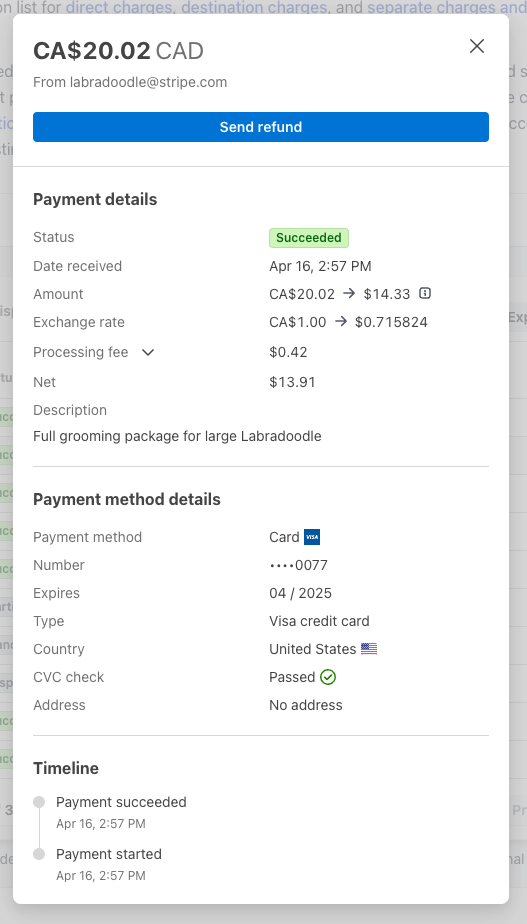
Processing the Refund #
After clicking on the payment, you will see detailed information about the transaction, which includes:
- Transaction ID
- Amount
- Status
- Date
To proceed with the refund, look for the Send Refund button:
- Click the Send Refund button.
- A confirmation prompt will appear.
- Review the confirmation details and confirm your action.
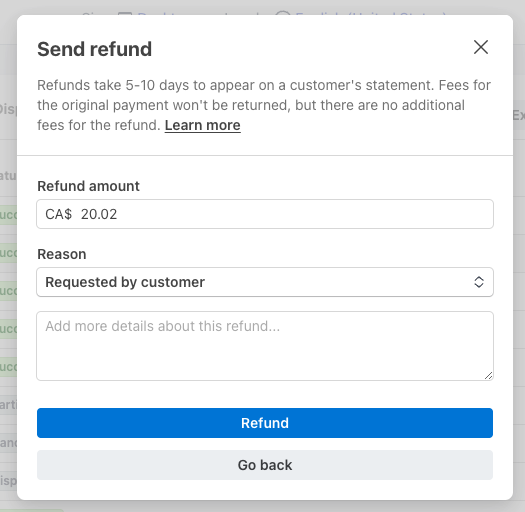
Confirmation of Refund #
Once you confirm the refund, the transaction will be processed accordingly. You may receive a notification indicating the refund’s status. After some time, make sure to check the payment update on the Payments page to ensure that the refund has been successfully processed.
Conclusion #
Issuing a refund in StellarPay is a straightforward process that allows you to manage customer transactions effectively. Just follow the steps outlined above, and you will be able to process refunds directly on your WordPress website with ease.
