- Logging Into Your StellarSites Website
- Launch Faster with Site Assist
- Your Event Engine: The Events Calendar
- Creating Your First Event
- What’s Included in Your Plan?
- Selling Event Tickets
- Using Event Templates and Kadence Blocks
- Promoting and Automating with Promoter
- Assigned Seating with Seating
- Streamline Imports with Event Aggregator
- Organize Multi-Day Events with Event Schedule Manager
- Expand Your Reach with Eventbrite Tickets
- FAQ: Getting Started with Events on StellarSites
Welcome to StellarSites—your all-in-one launchpad for running high-impact, low-stress event websites. Whether you’re planning weekly meetups, ticketed galas, or multi-day festivals, your Events Plan comes packed with everything you need to build, manage, and promote it all—without wrangling code or plugin chaos.
Let’s walk through setting up your site, creating your first event, and making the most of your plan’s powerful tools.
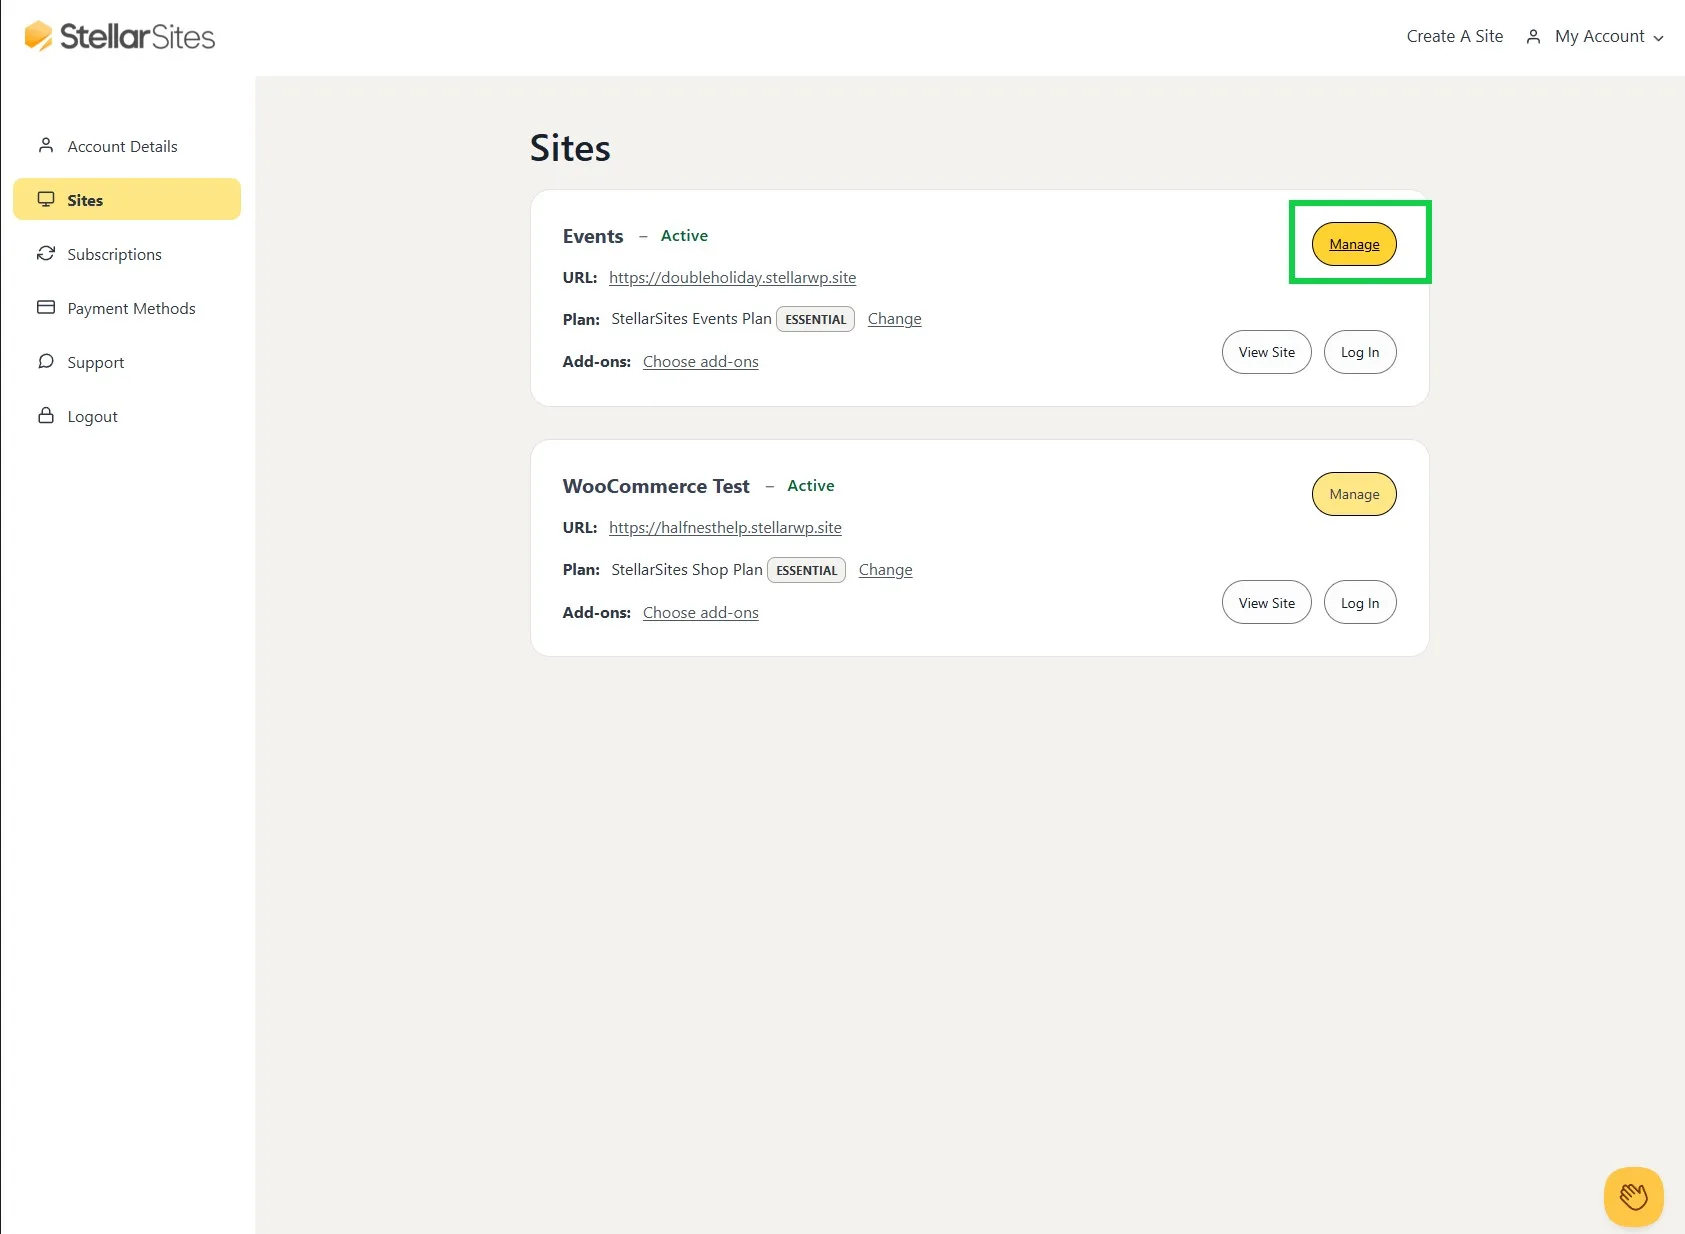
Logging Into Your StellarSites Website #
After purchase, check your inbox for a welcome email. You can log in using the link provided or head to your StellarSites dashboard > Sites > Log In.

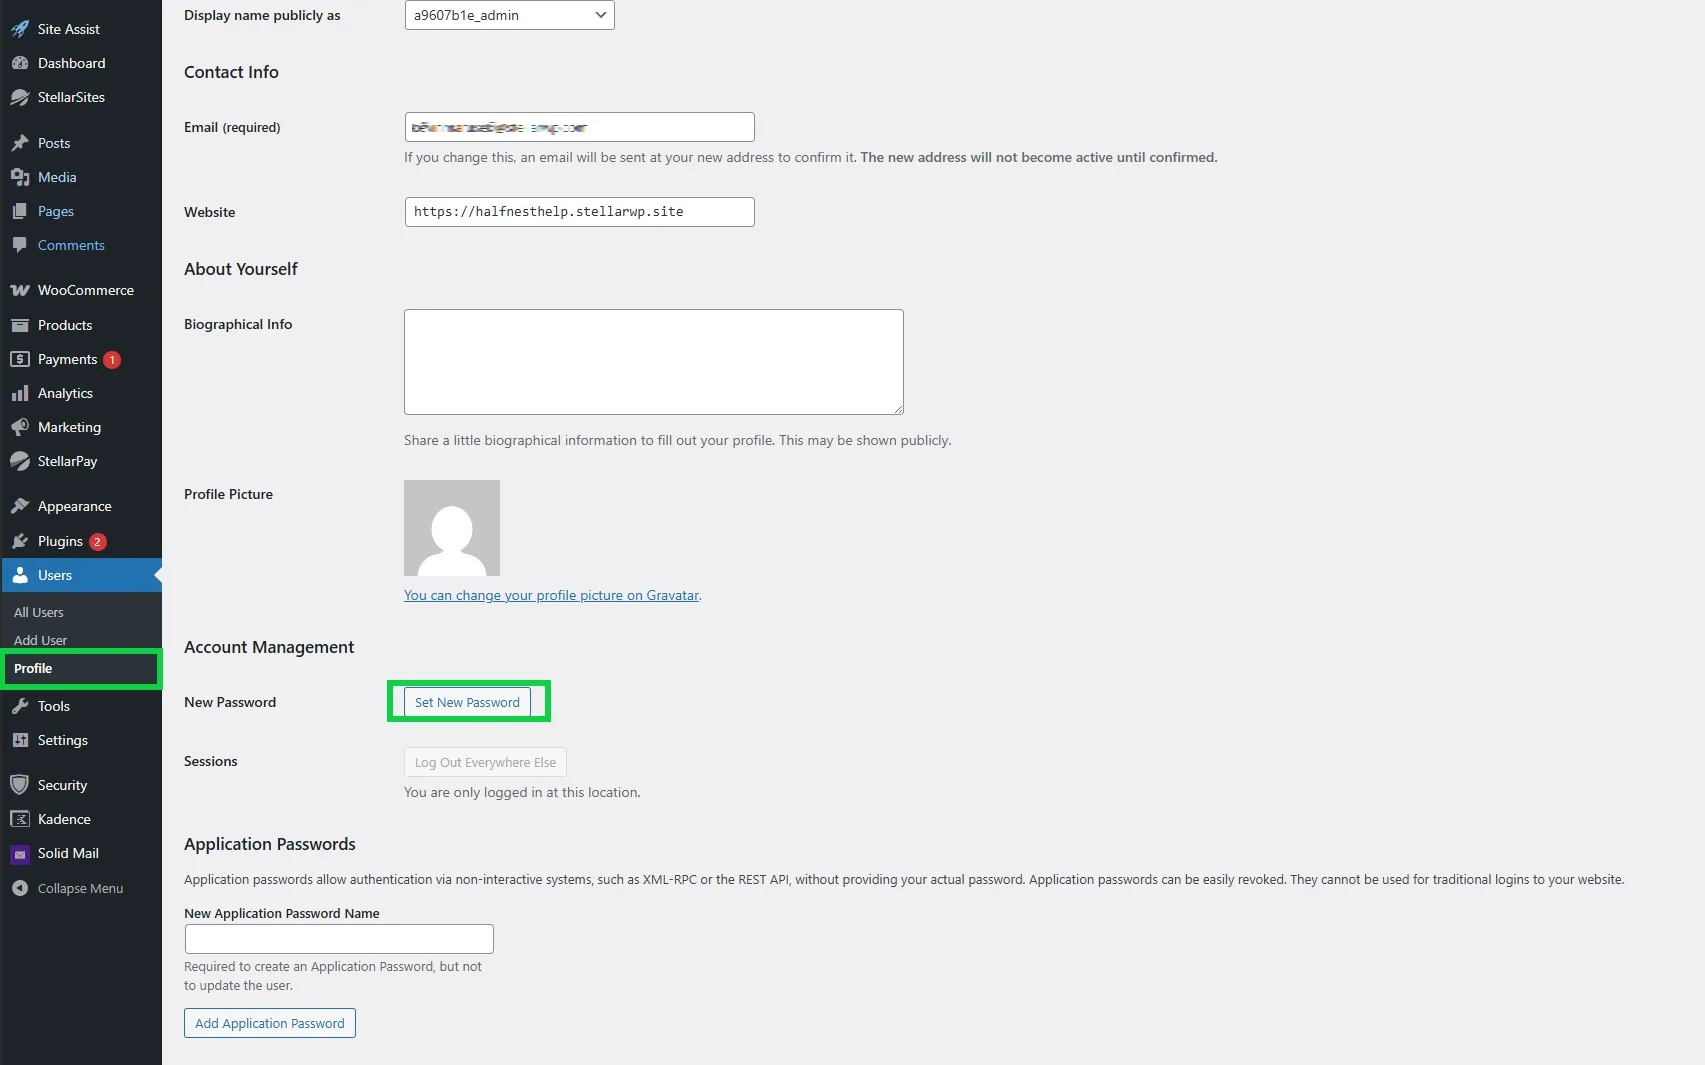
Once inside, it’s a good idea to set a new password from your WordPress dashboard > Users tab. Just click your username, set a new password, and you’re good to go.
Launch Faster with Site Assist #
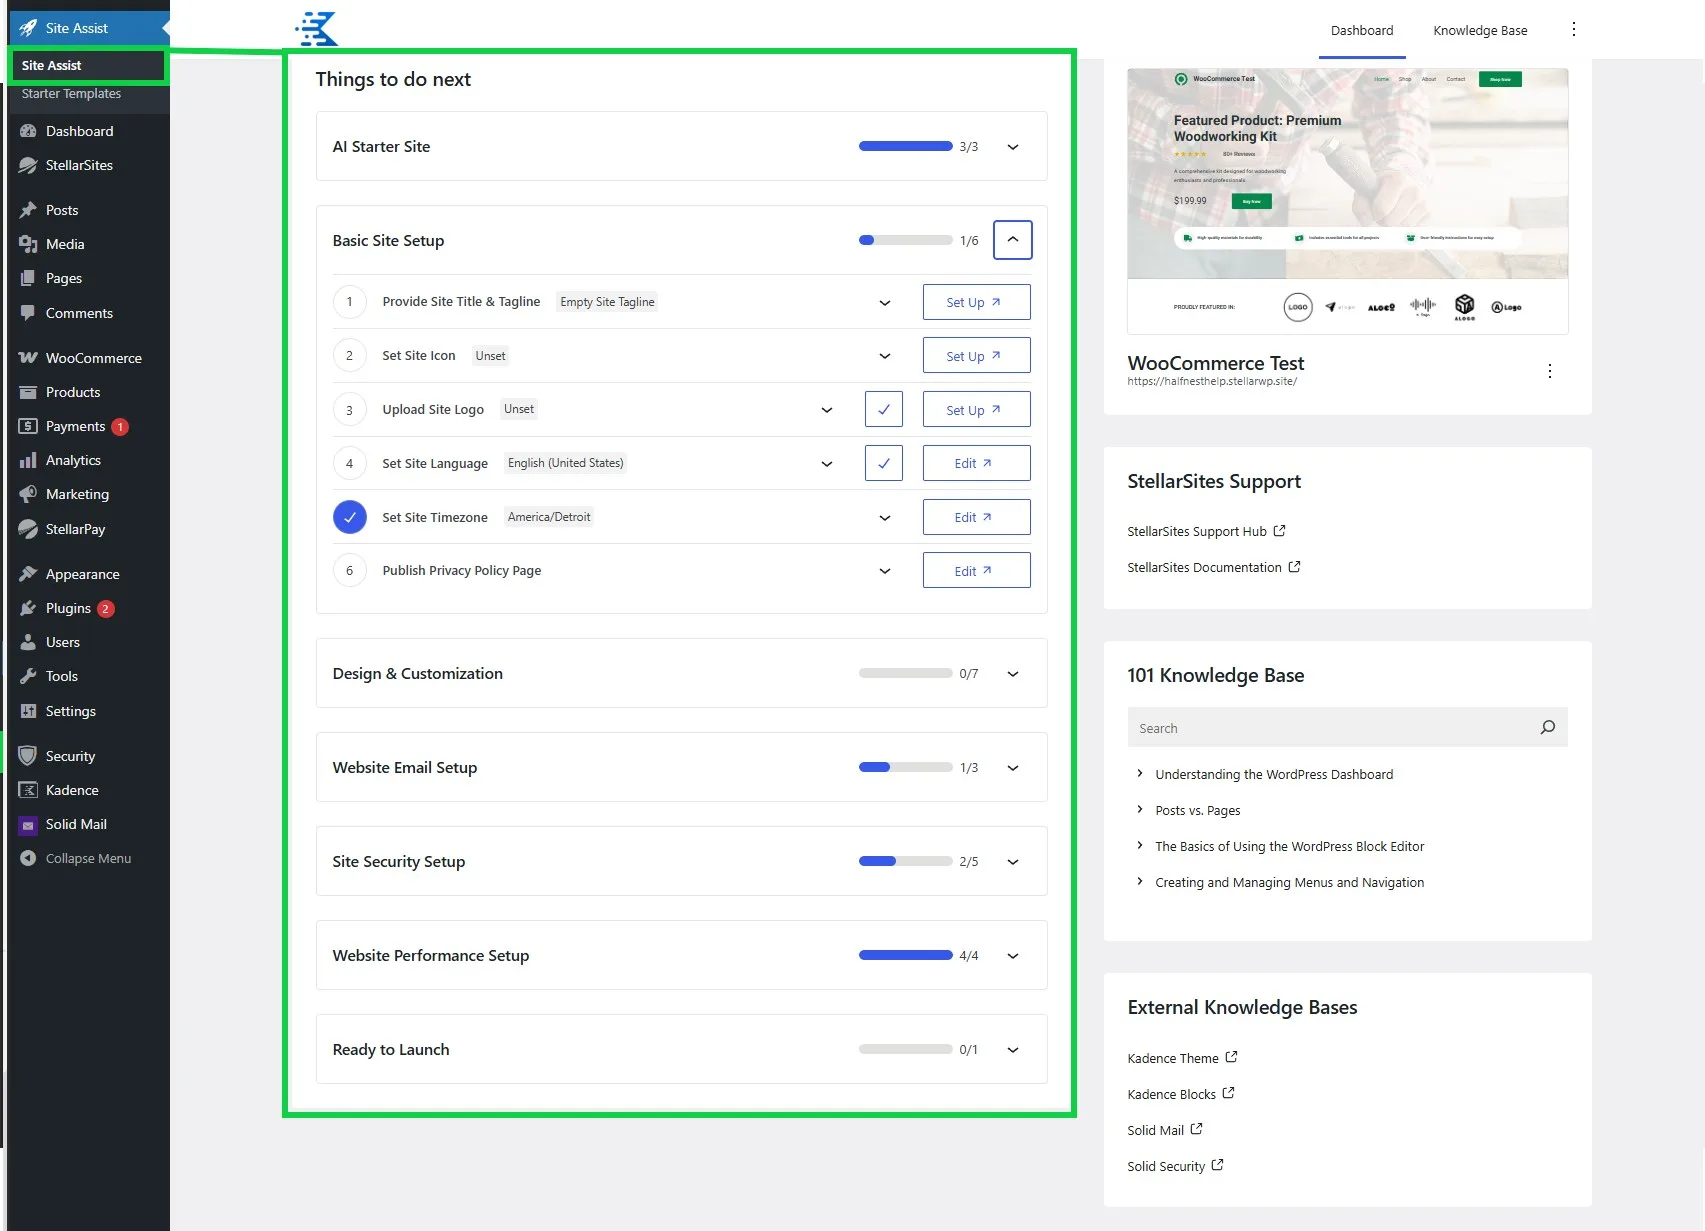
Site Assist is your built-in launch checklist. It guides you through must-do setup steps like configuring your location and timezone, tweaking the design and branding of your site, and so much more—so you can go live confidently and skip the usual WordPress headaches. You’ll find it right in your StellarSites dashboard after login.
Your Event Engine: The Events Calendar #
Your Events Plan comes pre-loaded with The Events Calendar, the core plugin powering event listings, calendar views, scheduling, and automation. You can create recurring events, add venues and organizers, highlight featured listings, and even support virtual events through Zoom or Google Meet. Depending on your plan tier, you’ll also have access to additional features like Filter Bar, Event Tickets, and community submissions.
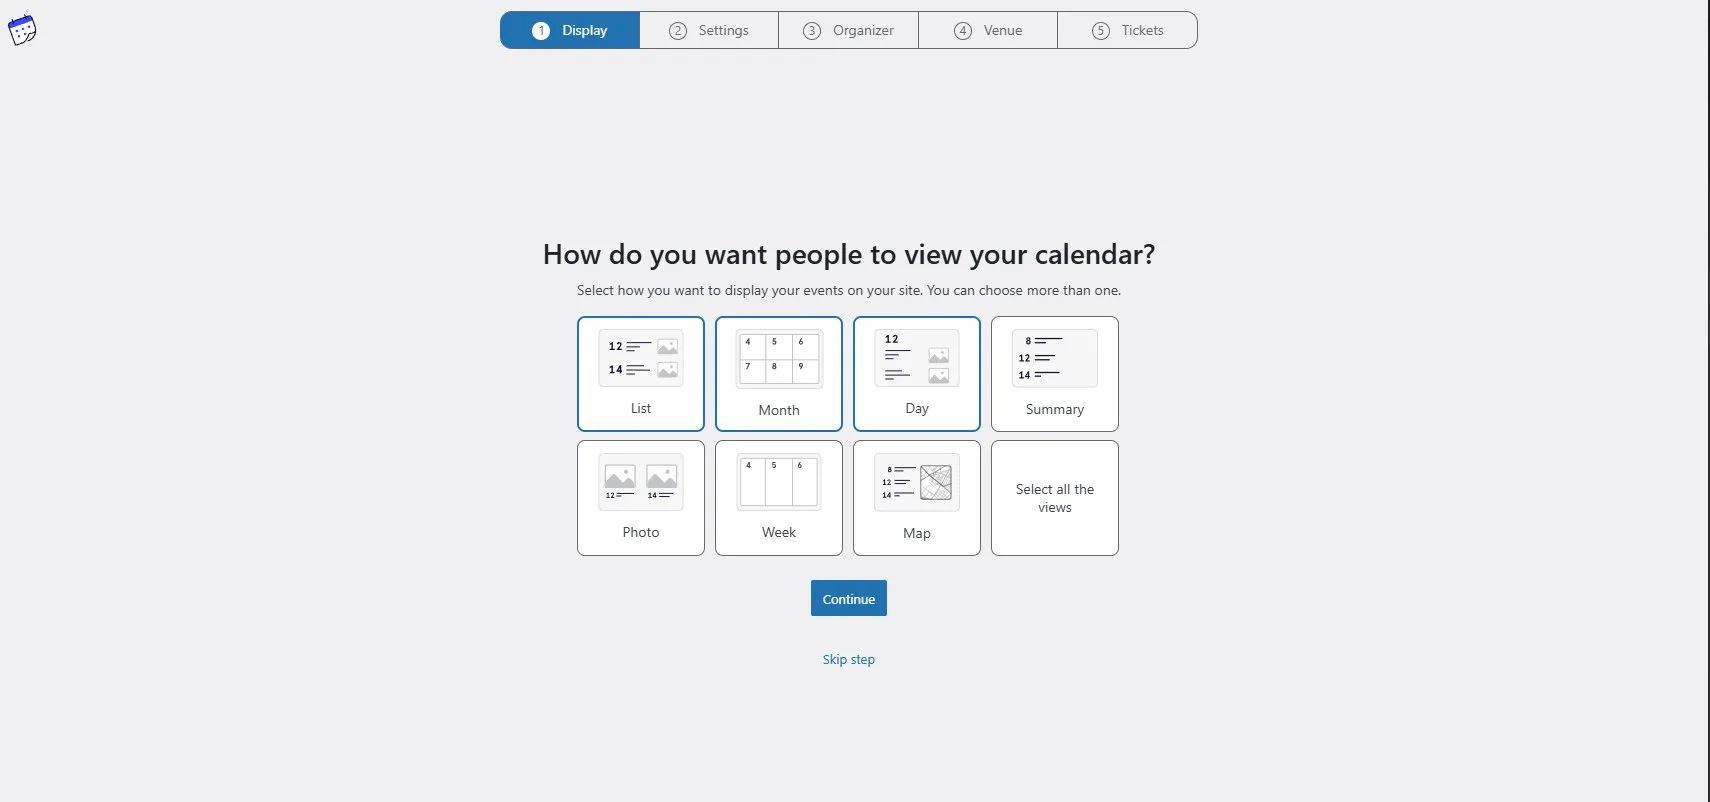
You can display events in Month, List, Day, Photo, or Map views, and embed calendars directly using Kadence Blocks. The best part? It all just works—right out of the box.
Creating Your First Event #
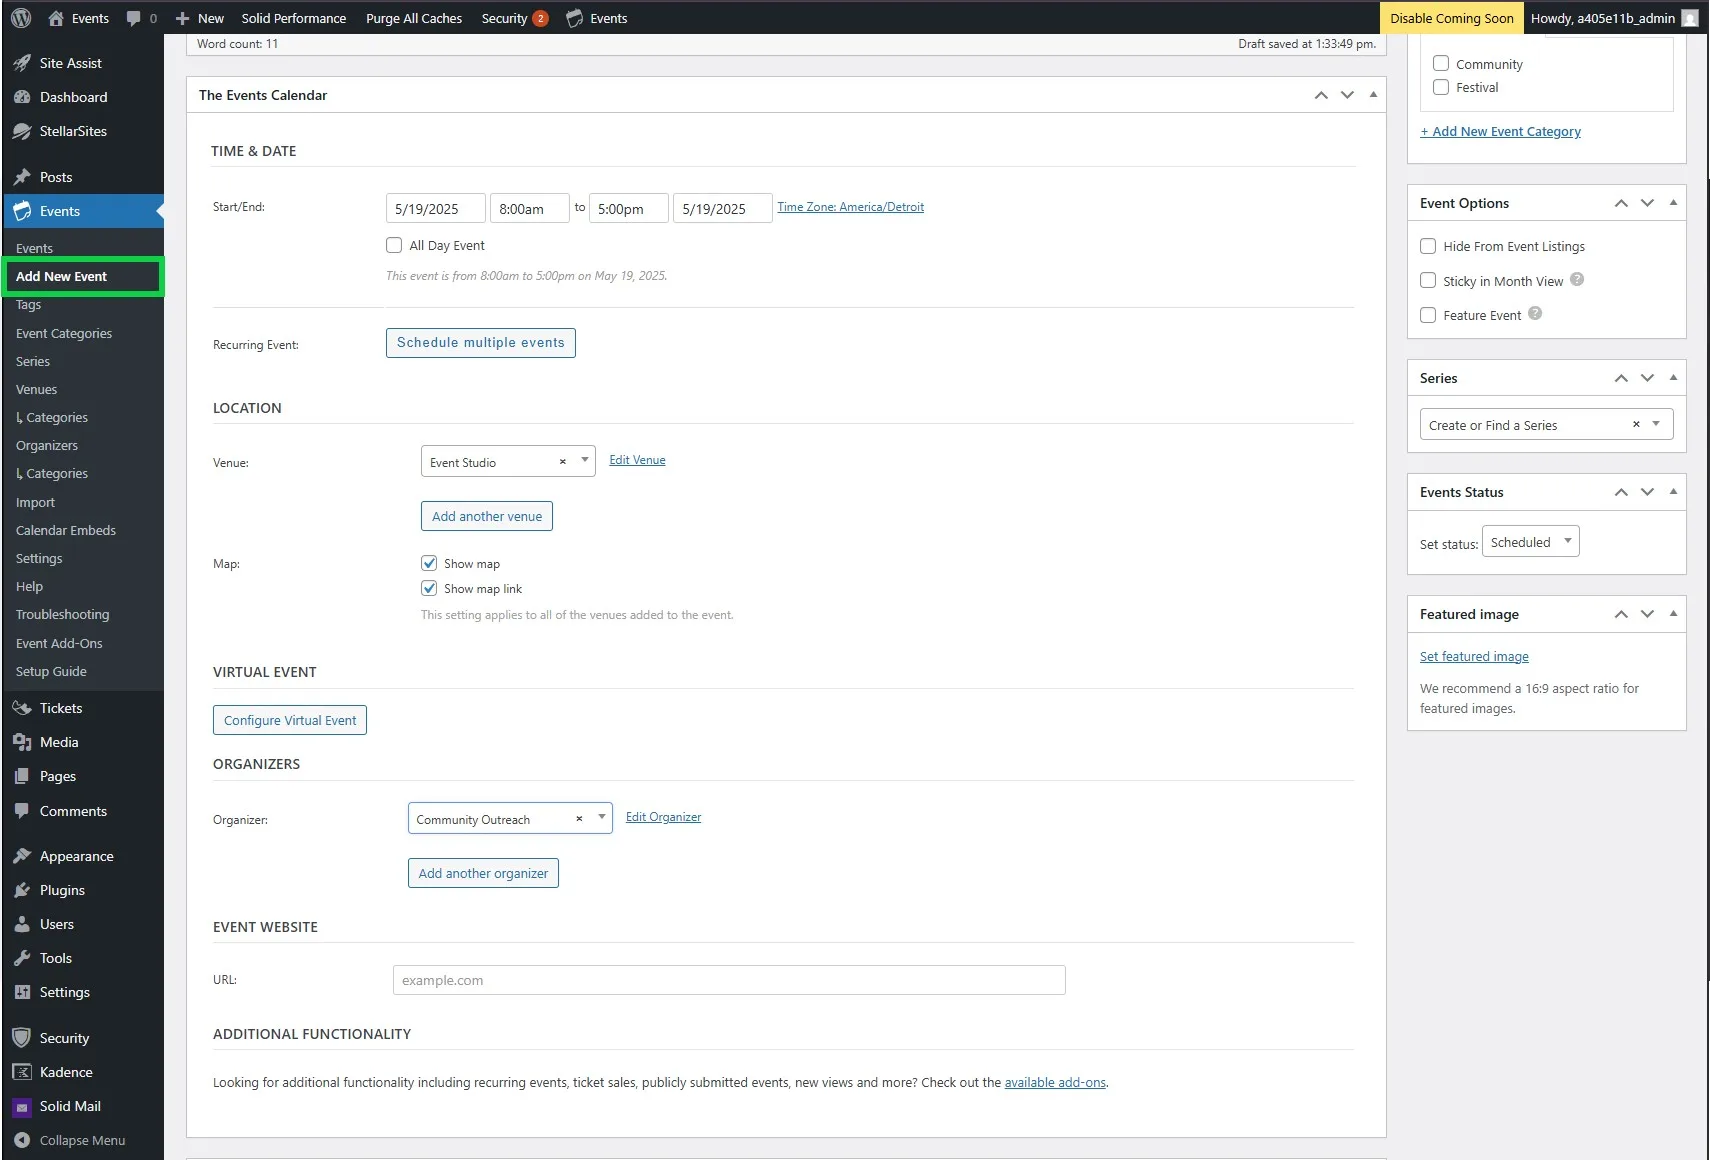
To add an event, go to Events > Add New in your WordPress dashboard. Add your title, details, and schedule. Assign a venue and organizer, tag your event, or add it to a category to help organize your calendar. When you’re ready, click Publish—your event is live.
What’s Included in Your Plan? #
Here’s what’s included in each tier:
Essentials Plan #
- Events Calendar Pro – Recurring events, advanced calendar views, shortcodes
- Filter Bar – Let users filter events by date, location, tag, and more
- Event Tickets – Simple ticket sales or RSVPs using Stripe or PayPal
Plus Plan (Everything in Essential +) #
- Event Tickets Plus – WooCommerce integration, custom registration fields, no Stripe fees
- Promoter – Automate event emails, reminders, follow-ups
Ultimate Plan (Everything in Plus +) #
- Community Events – Let users submit and even sell their own tickets for events
- Seating – Reserved seating for performances or premium layouts
- Event Aggregator – Import events from Google Calendar, Meetup, and more
- Event Schedule Manager – Build and display multi-session schedules
- Eventbrite Tickets – Sync with Eventbrite to manage ticket sales externally
Selling Event Tickets #
If Event Tickets or Tickets Plus is in your plan, you can enable ticketing through Events > Settings > Tickets. From there, choose where to enable ticketing (events, pages, posts), then select your payment method—Tickets Commerce or WooCommerce. To sell tickets, open an event, scroll to the Tickets section, click Add New Ticket, set your details, then save and publish. Attendees can now book directly from your site.
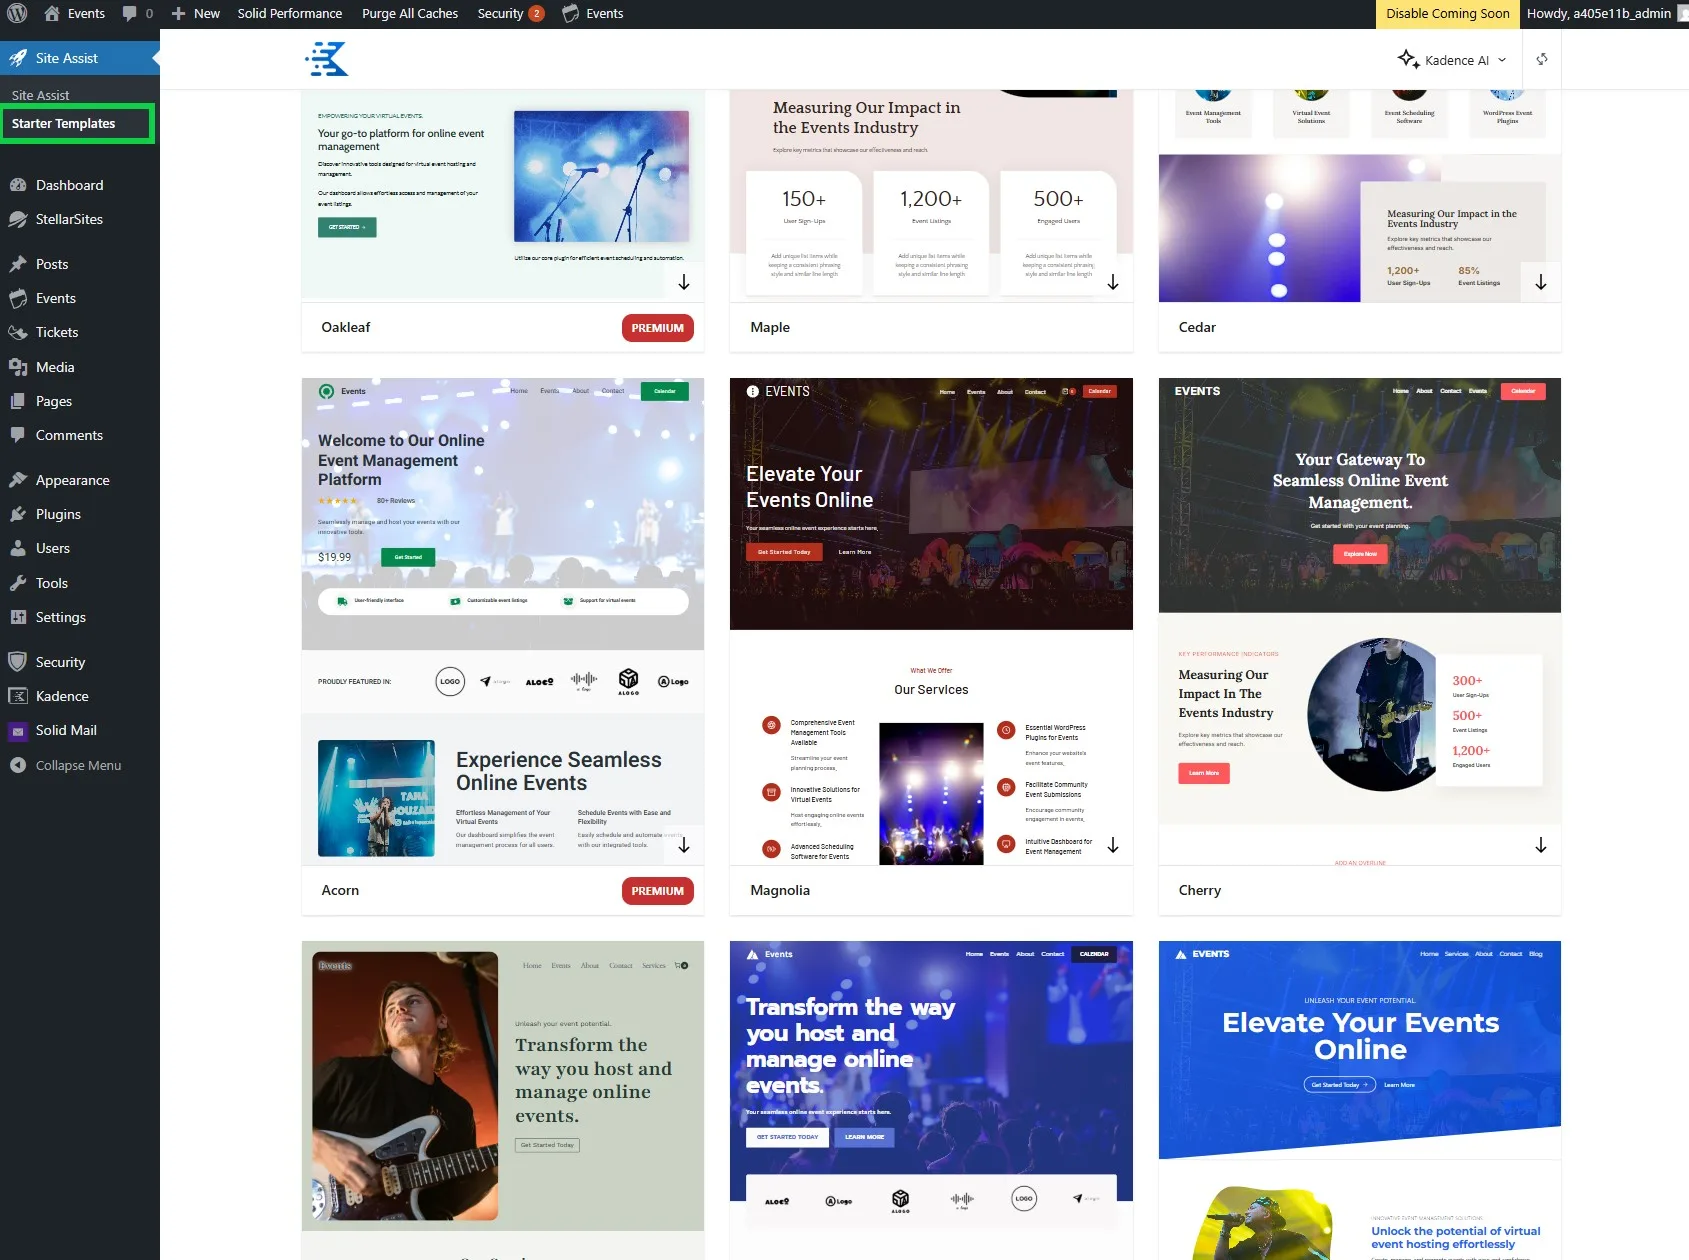
Using Event Templates and Kadence Blocks #
To help you get started fast, your StellarSite includes access to Kadence Starter Templates made specifically for event creators. Whether you’re promoting a festival, a community calendar, or a professional conference, you’ll find templates with hero sections, event listings, and built-in calls-to-action—all ready to customize.
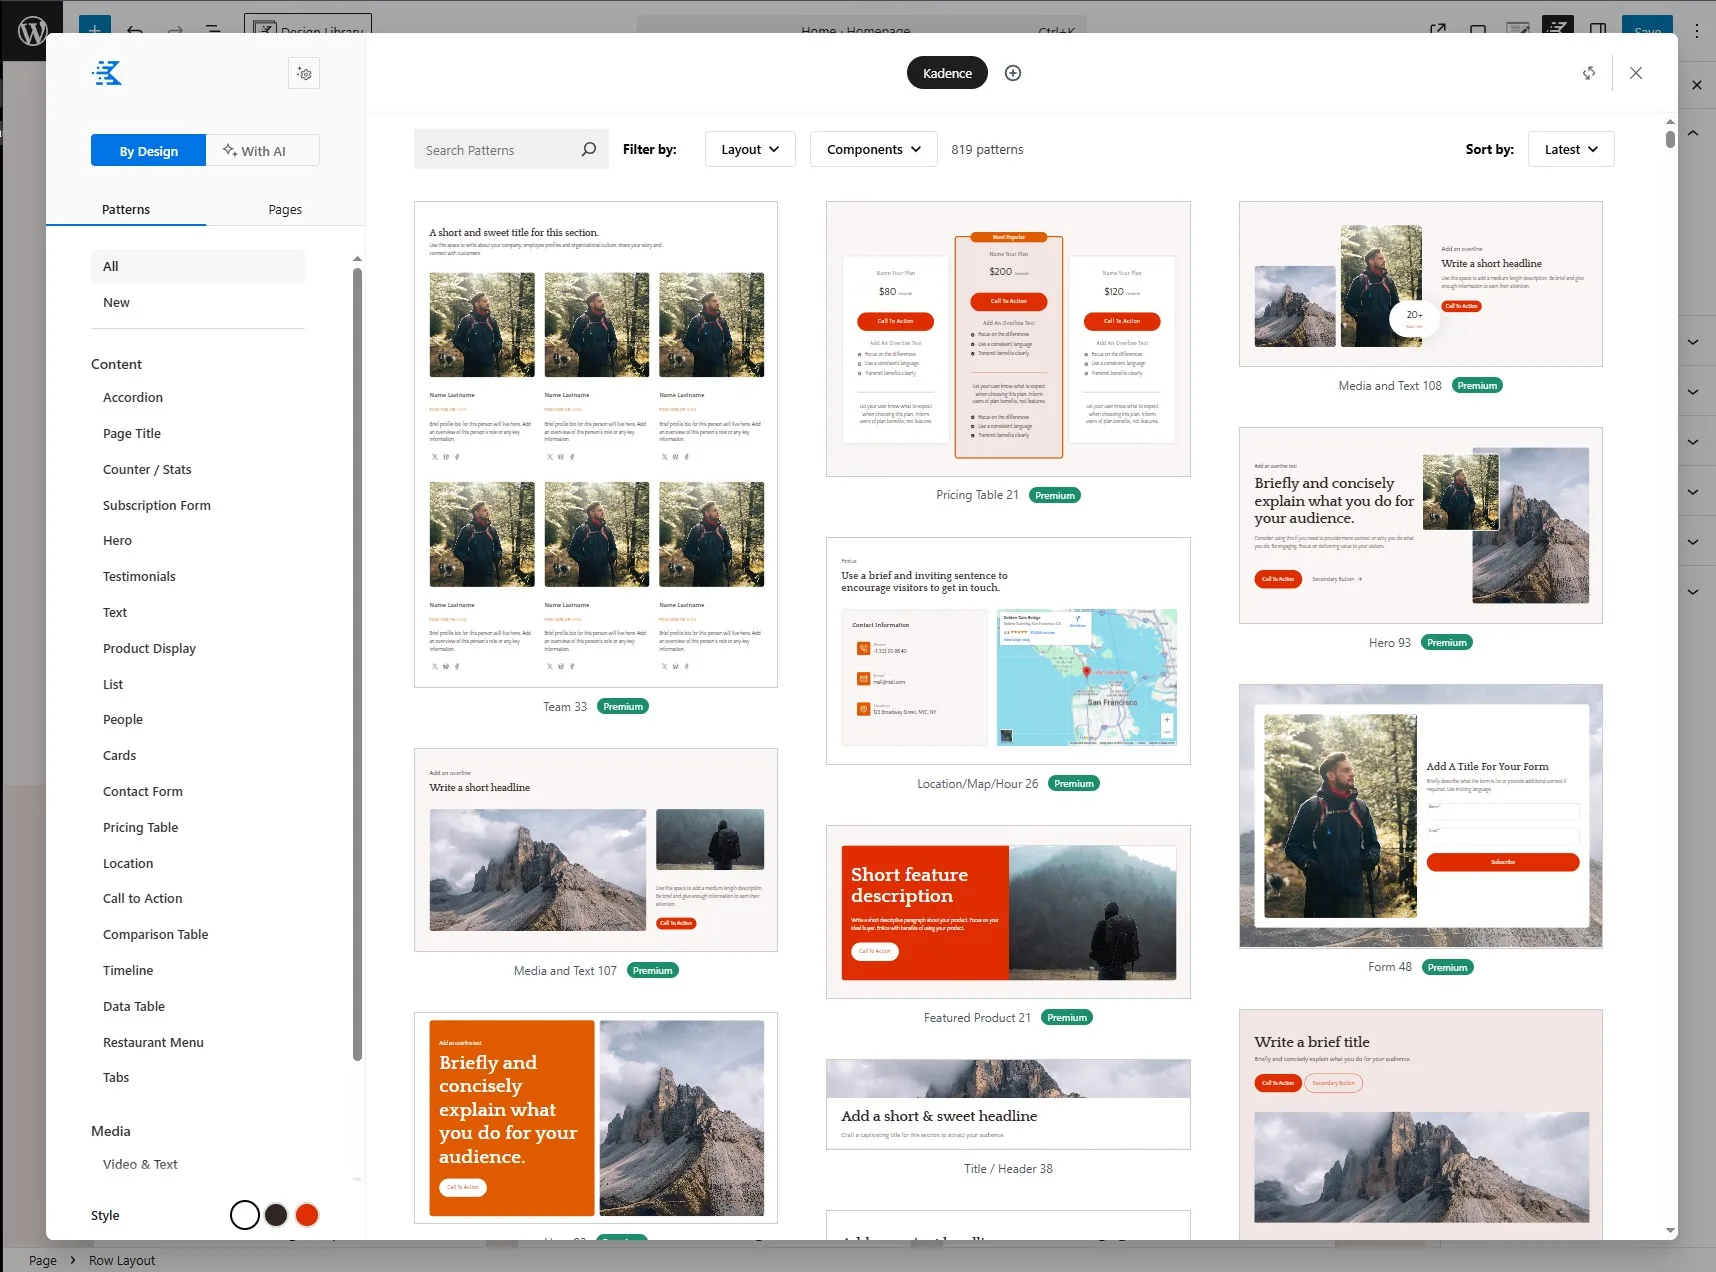
For even more flexibility, use the Kadence Design Library to drop in pre-built sections like countdowns, image galleries, speaker bios, and interactive maps. Everything integrates seamlessly with The Events Calendar.
Make Events Easy to Find with Filter Bar #
Available in all Events Plans and Add-ons
As your calendar fills up, the Filter Bar makes it easy for visitors to find exactly what they’re looking for quickly.
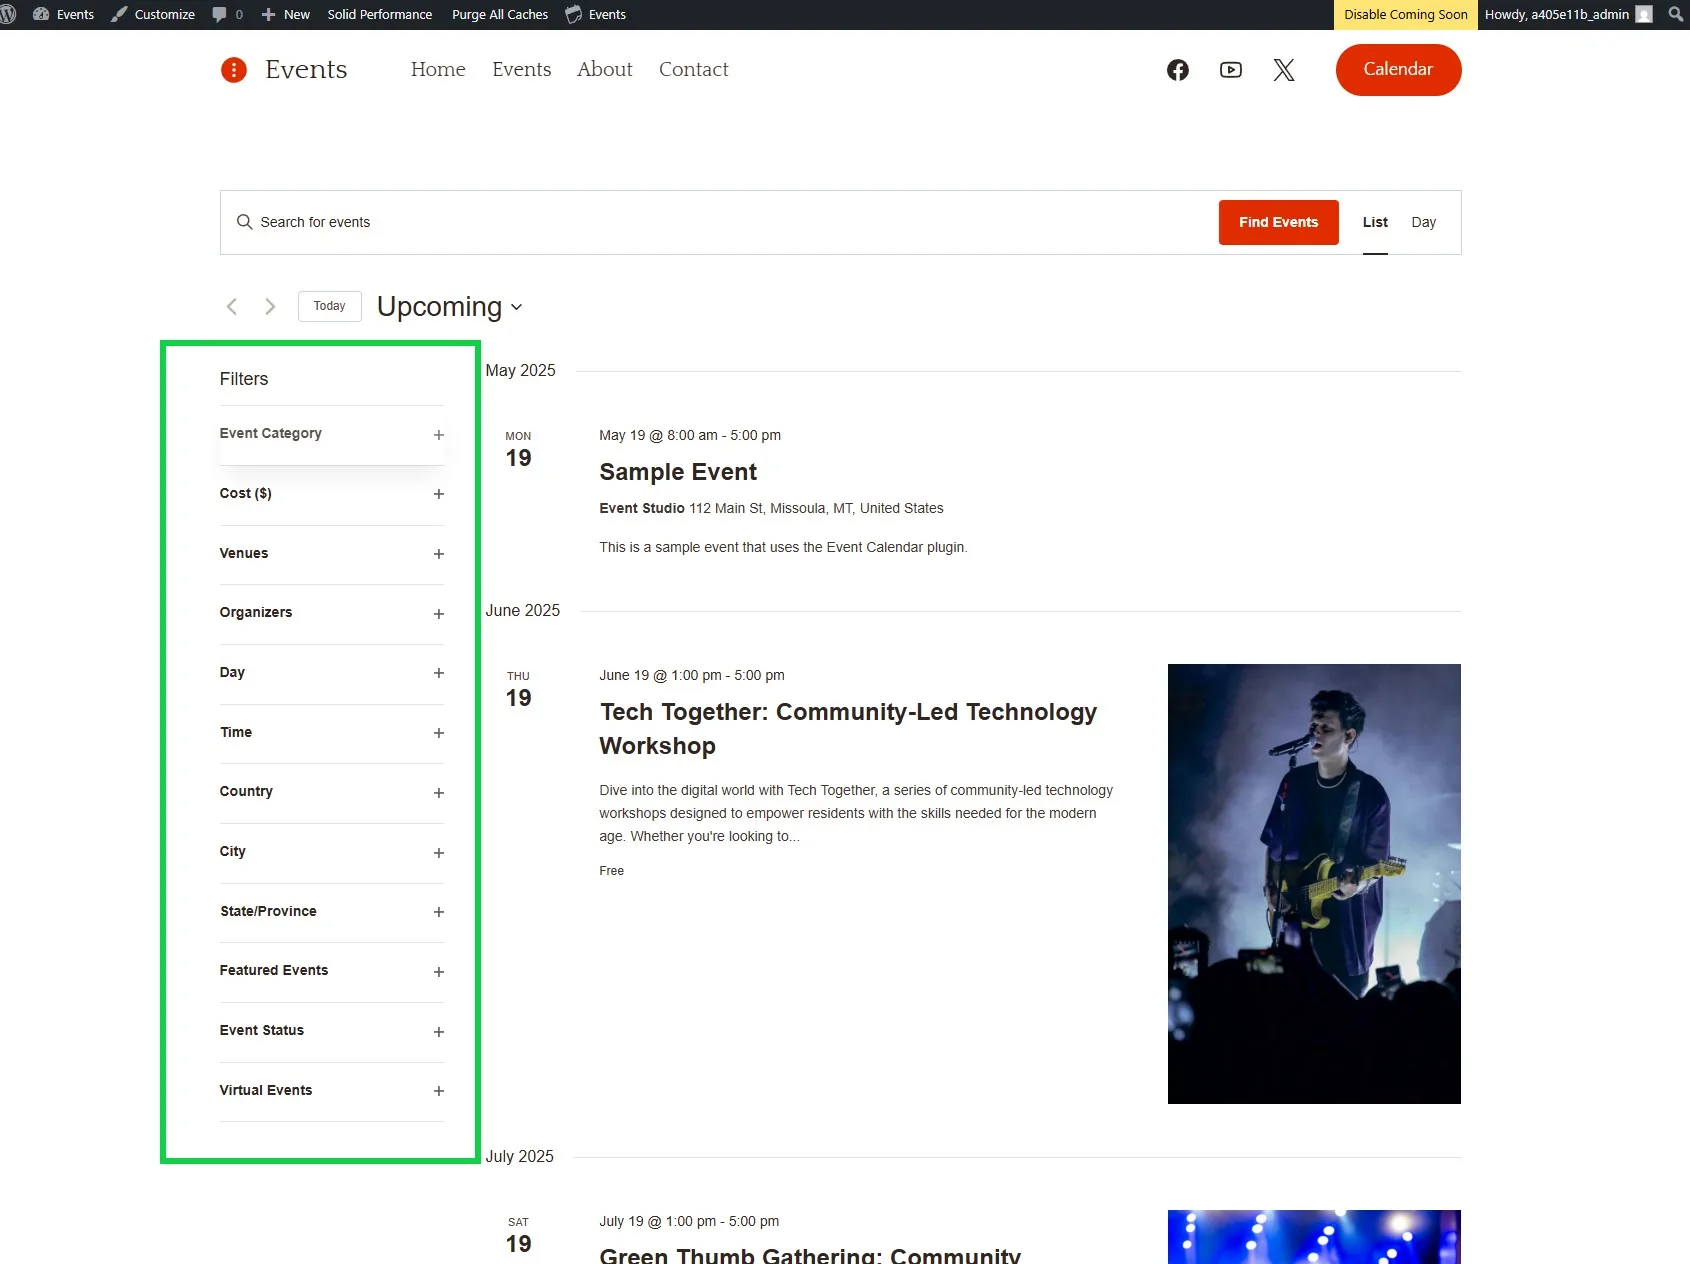
With this powerful add-on, users can sort and filter events by:
- Category
- Tag
- Venue
- Organizer
- Day or Date Range
- And more
The filters appear right above your event listings and update instantly—no page reloads needed. It’s a smoother, smarter way to browse your calendar, especially when you’re hosting multiple events each week.
Whether you’re running workshops, concerts, or community meetups, Filter Bar ensures your audience can quickly find what interests them most.
Want to explore everything Filter Bar can do? Read the full guide.
Promoting and Automating with Promoter #
Included in Events Plus and Ultimate Plans and Add-ons
When your plan includes Promoter, your events don’t just sit on a calendar—they show up in inboxes, drive engagement, and fill seats.
Promoter lets you:
- Send automated email campaigns for upcoming events
- Remind attendees before the big day
- Follow up after the event with surveys or special offers
You control the message and timing—Promoter handles the rest. It’s your event marketing assistant, built right in.
To activate your Promoter account: #
IMPORTANT: It is recommended to configure Promoter on your live domain (not your original StellarSites domain received at purchase). Learn how to configure your live domain.
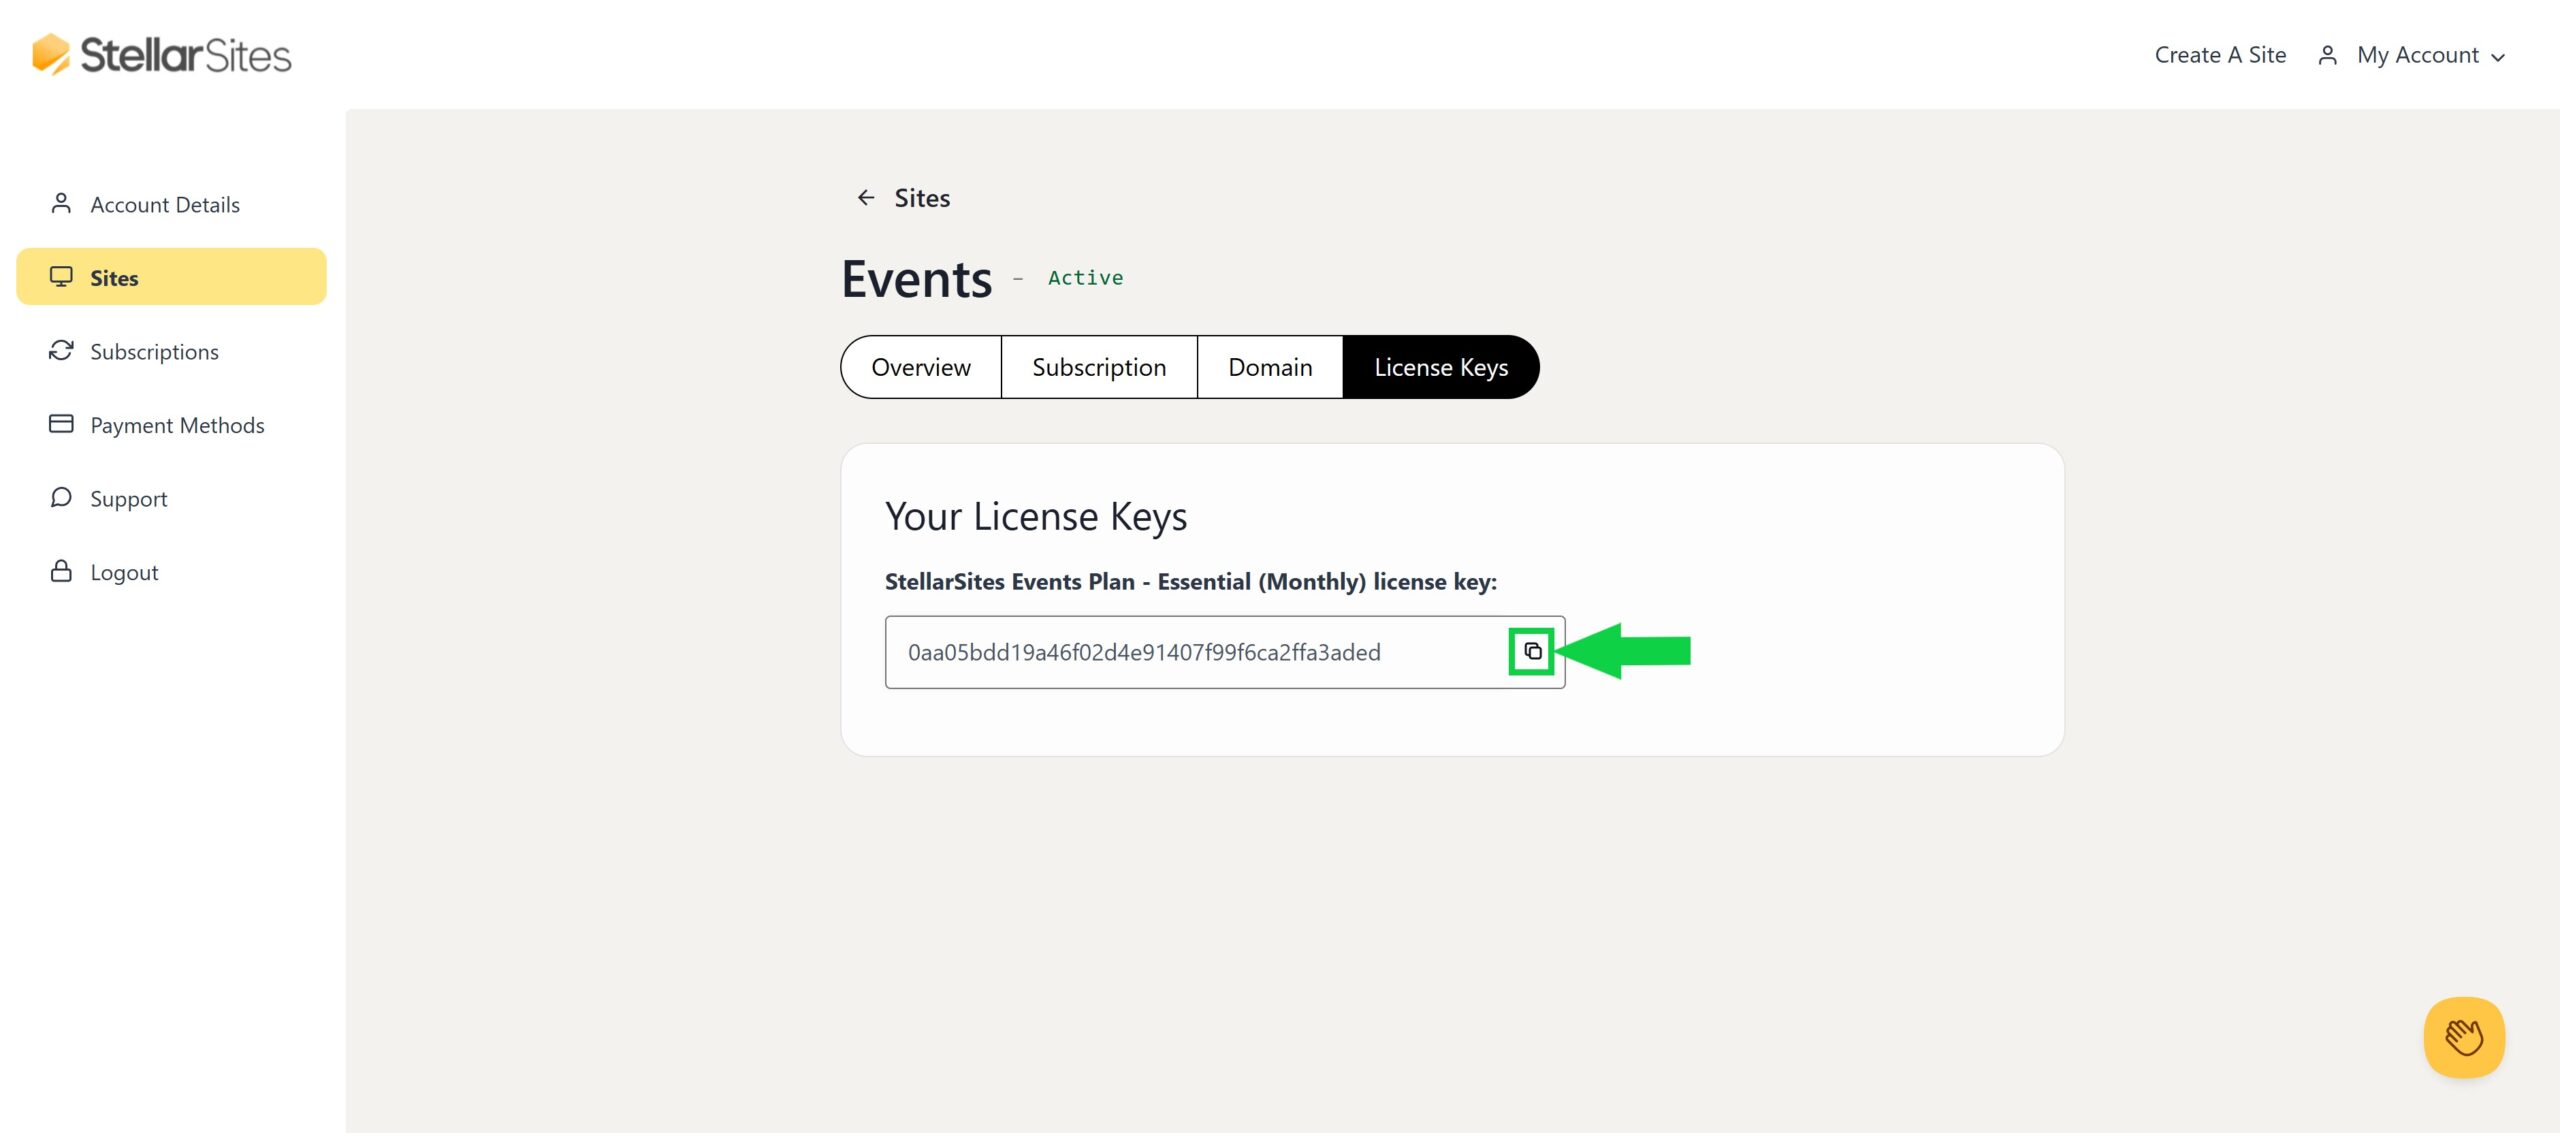
- First, grab your StellarSites license key.
- Copy your license key and navigate to your WordPress dashboard > Events > Settings > Licenses > Promoter > Paste your license key.
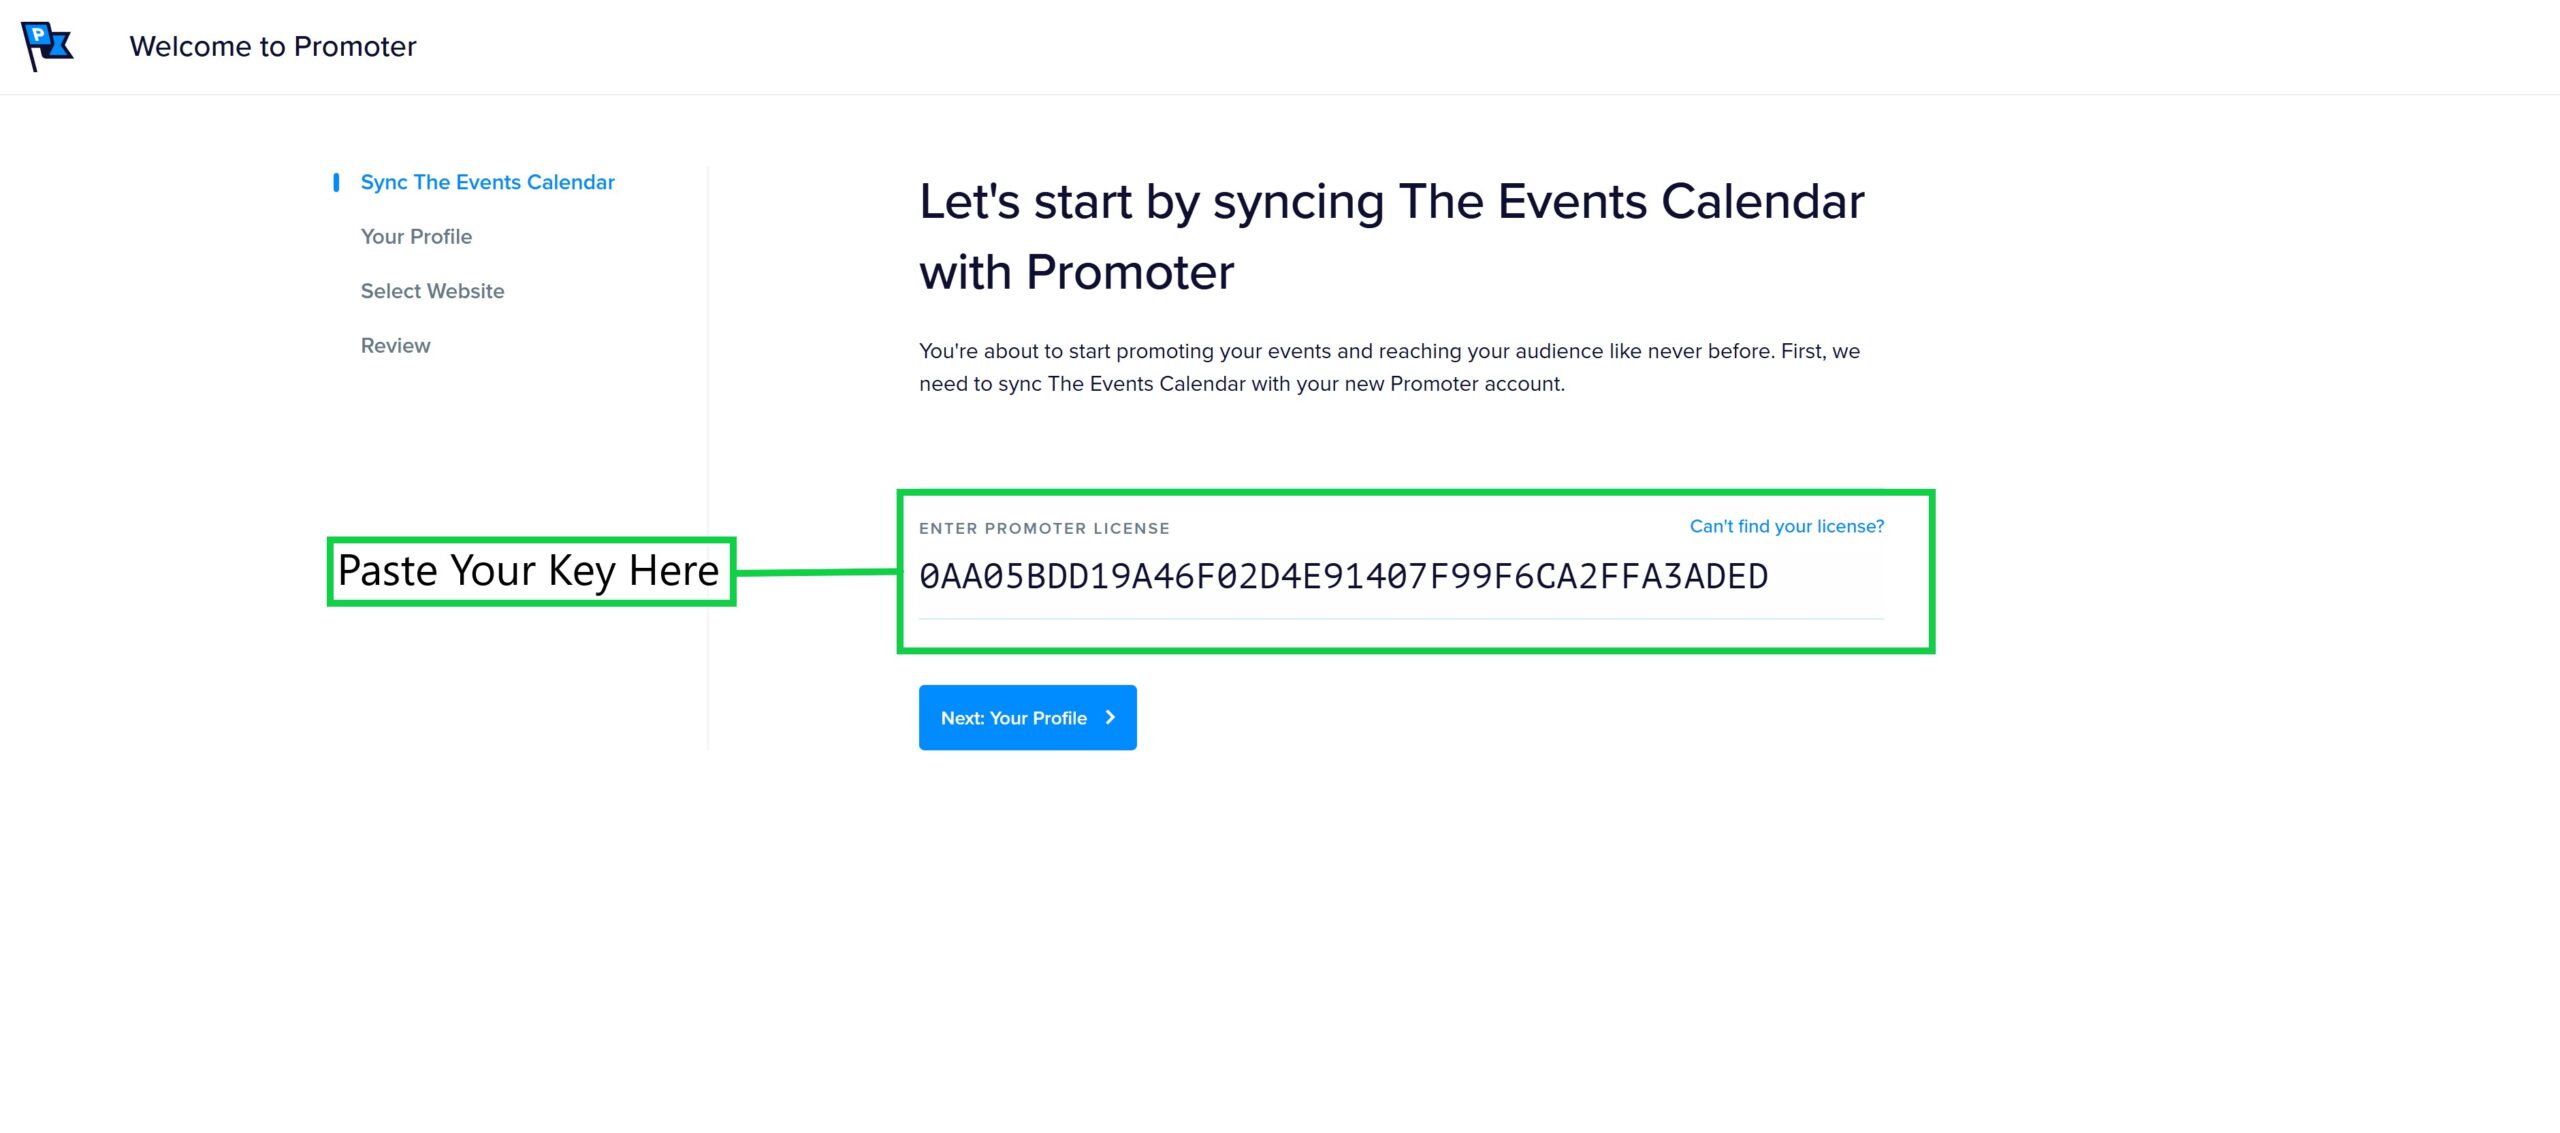
- Next, create a new account in Promoter using your license key.
Need a deep dive into Promoter’s capabilities? Check out this guide
Assigned Seating with Seating #
Included in all Event Ultimate Plans or Add-ons
Give your attendees the power to choose their exact seats with the Seating add-on. Design interactive seating maps that reflect your venue’s layout, allowing for specific seat types like VIP, accessible, or general admission. Attendees can select their preferred seats directly from the map during checkout, enhancing their experience and your event’s professionalism.
Manage seat assignments effortlessly, with options to change or remove assignments as needed. Seating integrates seamlessly with Event Tickets, ensuring a smooth ticketing process for both organizers and attendees.
Streamline Imports with Event Aggregator #
Included in all Event Ultimate Plans or Add-ons
Keep your calendar populated and up-to-date with Event Aggregator. This powerful tool allows you to import events from various sources like Google Calendar, iCal, and more. Set up automatic imports to ensure your event listings are always current, saving you time and effort.
Whether you’re managing multiple calendars or consolidating events from different platforms, Event Aggregator simplifies the process, ensuring your audience has access to the latest information.
🔗 Get started with Event Aggregator
Organize Multi-Day Events with Event Schedule Manager #
Included in all Event Ultimate Plans or Add-ons
Plan and present complex, multi-day events with ease using Event Schedule Manager. Create detailed schedules featuring sessions, speakers, and sponsors, and display them in customizable layouts. Highlight mainstage events, organize tracks, and provide attendees with a clear, professional agenda.
Event Schedule Manager integrates seamlessly with The Events Calendar, allowing you to add schedules to any post type. Use shortcodes or blocks to embed schedules, ensuring your event information is accessible and well-organized.
🔗 Learn more about Event Schedule Manager
Expand Your Reach with Eventbrite Tickets #
Included in all Event Ultimate Plans or Add-ons
Leverage the power of Eventbrite while keeping your website as the central hub with Eventbrite Tickets. This integration allows you to sync events between your site and Eventbrite, manage ticket sales, and track attendees seamlessly.
Create events on your WordPress site and publish them to Eventbrite, or import existing Eventbrite events into your calendar. Maintain consistent branding and provide a unified experience for your attendees, all while benefiting from Eventbrite’s extensive reach.
🔗 Get started with Eventbrite Tickets

